Microsoft Power BI provides a powerful way to visualise SharePoint data and build reports and dashboards on SharePoint lists and libraries. With the introduction of a Power BI web part (and the embed code) we can now also integrate these Power BI assets in our SharePoint sites.
In this blog post we will cover how to:
- Create a Power BI report on a SharePoint list
- Configure the Power BI report to use direct query on the SharePoint data to keep the report up to date
- Embed the Power BI report in SharePoint online
Power BI direct query with SharePoint lists
You may be wondering how we can use direct query with SharePoint data because according to this article from the Power BI team states that only the following data sources are currently supported:
- SQL Server
- Azure SQL Database
- Azure SQL Data Warehouse
- SAP HANA
- Oracle Database
- Teradata Database
- Amazon Redshift (Preview)
- Impala (Preview)
- Snowflake (Preview)
Well we have a clever workaround to make your SharePoint data available as an additional direct query data source
Configuring SharePoint direct query for Power Bi
Pre-Requisites
To set up direct query for SharePoint lists and libraries and to embed the report in SharePoint Onlie you will need the following:
- AxioWorks SQList to synch your SharePoint lists to normalised SQL Azure tables. Download a trial here
- A SQL Azure database
- Power BI Pro
- A SharePoint Online tenant
Step 1: Synch SharePoint data to SQL Azure
First of all we’ll configure a replication using the SQList service to synch our SharePoint list to SQL Azure.
Open the SQList Manager and click new replication
Enter the details of the SharePoint Online site (could also be onprem), username and password and test the connection
Click Next
Next enter the details of the SQL Azure database and test the connection (ensure that your SQL Azure firewall rules allow access from the machine that SQList is running on)
Click next
Select “Export the lists and libraries from this site only” since we are only exporting one list
You will now see all the lists in the site we have selected. We are going to select the “Axioworks Sales” list which contains 8414 rows
Click Next and click finish
The SQList service will now start and will begin to synchronise the SharePoint list data with SQL Azure. You will see the SQList Service is running and data is being synchronised:
At this point you could close the SQList manager and leave the windows service to keep the data in synch.
If we open this lists in the SharePoint site we will see the following columns in this list:

And the data looks something like this:
Once the replication is complete we can open the database in SQL Server Management studio:
Step 2: Configure Power BI to use SharePoint data synched to SQL Azure
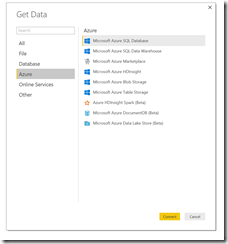
First of all, let’s open our Power BI desktop application and Get the data from our SQL Azure database
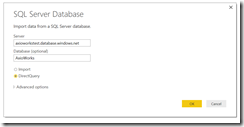
And enter our SQL Azure database details and click ok:
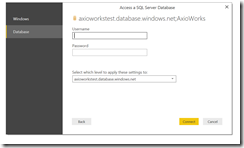
And now enter our credentials to access the database and click connect:
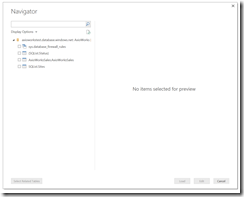
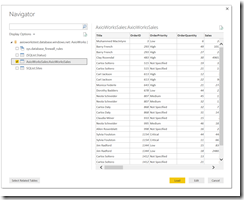
Open the navigator and select the table of interest.
In our case, SQList is keeping the AxioWorksSales:AxioWorksSales table in synch with our SharePoint list
Click “Load” and we now see the Power BI canvas to allow us to create our first visualistaion
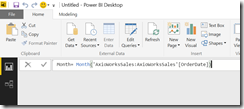
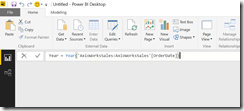
But first I’m goign to create a column for Month that I’m going to use in my visualisation:
And I’ll do the same for year:
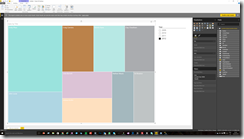
Now I’m goign to create a visualisation using Treemap and use a slicer based on year.
I’m also going to filter where sales > 30K
Export to Power Bi service
File -> Publish -> Publish to Power BI Service
Sign In to Power BI
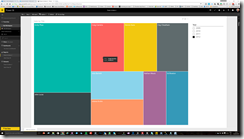
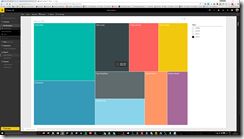
And I now have a visualisation based on my SharePoint list
Step 3: Embed in SharePoint Online
There are a few requirements in order for Embed in SharePoint Online reports to work.
- The Power BI (Preview) web part for SharePoint Online requires new SharePoint features to be enabled. Your tenant needs to be enrolled in the Set up the Standard or First Release options in Office 365 program to use this feature.
- The First Release for everyone option must be selected.
- The Power BI (Preview) web part for SharePoint Online requires Modern Pages.
Step 3: Embed your report in SharePoint Online
In order to embed your report into SharePoint Online, you will first need to get the URL for the report and then use that URL with the new Power BI web part within SharePoint Online.
Get a URL to your report
- View the report within the Power BI service.
- Select the File menu item.
- Select Embed in SharePoint Online (Preview).

- Copy URL from dialog.

Note:
You can also use the URL that is displayed in your web browser’s address bar when viewing a report. That URL will contain the report page you are currently viewing. You will need to remove the report section, from the URL, if you want to use a different page.
Add the Power BI report to a SharePoint Online page
- Open the desired page in SharePoint Online and select Edit.
 Or, create a new modern site page by selecting + New within SharePoint Online.
- Select + and select the Power BI (Preview) web part.

- Select Add report.

- Past the report URL into the property pane. This is the URL you copied from the steps above. The report will load automatically.

- Select Publish to make the change visible to your SharePoint Online users.

Granting access to reports
Embedding a report in SharePoint Online does not automatically give users permission to view the report. The permissions to view the report are set within the Power BI service.
Important: Make sure to review who can see the report within the Power BI service and grant access to those not listed.
There are two ways to provide access to the report within the Power BI service. If you are using an Office 365 Group to build your SharePoint Online team site, you list the user as a member of the app workspace within the Power BI service. This will make sure that users can view the contents of that group. For more information, see Create and distribute an app in Power BI.
Alternatively, you can grant users access to your report by doing the following.
- Add a tile from the report to a dashboard.
- Share the dashboard with the users that need access to the report. For more information, see Share a dashboard with colleagues and others.
Web part settings
Below is a description of the settings that can be adjusted for the Power BI web part for SharePoint Online.
 Property
Description
Page name
Sets the default page that is shown by the web part. Select a value from the drop down. If no pages are displayed, either your report has one page, or the URL you pasted contains a page name. Remove the report section from the URL to select a specific page.
Display
Option to adjust how the report is fit within the SharePoint Online page.
Show Navigation Pane
Shows or hides the page navigation pane.
Show Filter Pane
Shows or hides the filter pane.
Multi-factor authentication
If your Power BI environment requires you to sign-in using multi-factor authentication, you may be asked to sign-in with a security device to verify your identity. This will occur if you did not sign-in to SharePoint Online using multi-factor authentication but your Power BI environment requires an account validated by a security device.
Note: Multi-factor authentication is not yet supported with Azure Active Directory 2.0. Users will receive a message saying error. If the user signs-in again to SharePoint Online using their security device, they may be able to view the report.
Reports that do not load
Your report may not load within the Power BI (Preview) web part and may show the following message.
This content isn’t available.
There are two common reasons for this message.
- You do not have access to the report.
- The report was deleted.
You should contact the owner of the SharePoint Online page to help you resolve the issue.


