In this blog, We will take an in-depth look into how SQList transforms SharePoint lists into SQL tables and how it stores data into each column. We will also look at how all changes made in SharePoint are continuously synchronized into their corresponding SQL Server tables.
Scenario
Replication of SharePoint lists data into SQL Server database and analysis of the columns created in SQL table for the respective SharePoint list columns of various types, including choice, currency, single-lookup, and multi-lookup columns.
If you would rather watch a video, this tutorial is also available on our YouTube channel at: https://youtu.be/MFXrrlZ5tAA
SharePoint Lists
For this demo, we will use three custom lists with some data in SharePoint Online.
Product list
- This list contains all the product data.
- Columns
- Title (Single Line of Text)
- Unit Price (Money)
- Current Stock (Number)
- Category ID (single-lookup column linked to category list).
Invoice List
- It is a custom list that contains data of the invoices created for product orders.
- Columns
- Title (Single Line of Text)
- Customer ID (lookup column linked to a Customer list).
- Product IDs (multi-lookup column linked to Products list).
- Total Amount (Currency)
Customer List
- It is a picture library used to store details of all the customers.
- Columns
- Title (Single Line of Text)
Step-1: Create a Database in SQL Server
First off, we need a database that will be used for replicating the data coming from SharePoint lists.
Open SQL Server Management Studio and create a new database named “AxioDemoSpColumns”.

Step-2: Replicate and Synchronize data to Database
Secondly, we need to replicate the data from SharePoint lists into SQL Server database. We will use SQList to achieve that.
Open SQList Manager and click on “Create a new replication”.

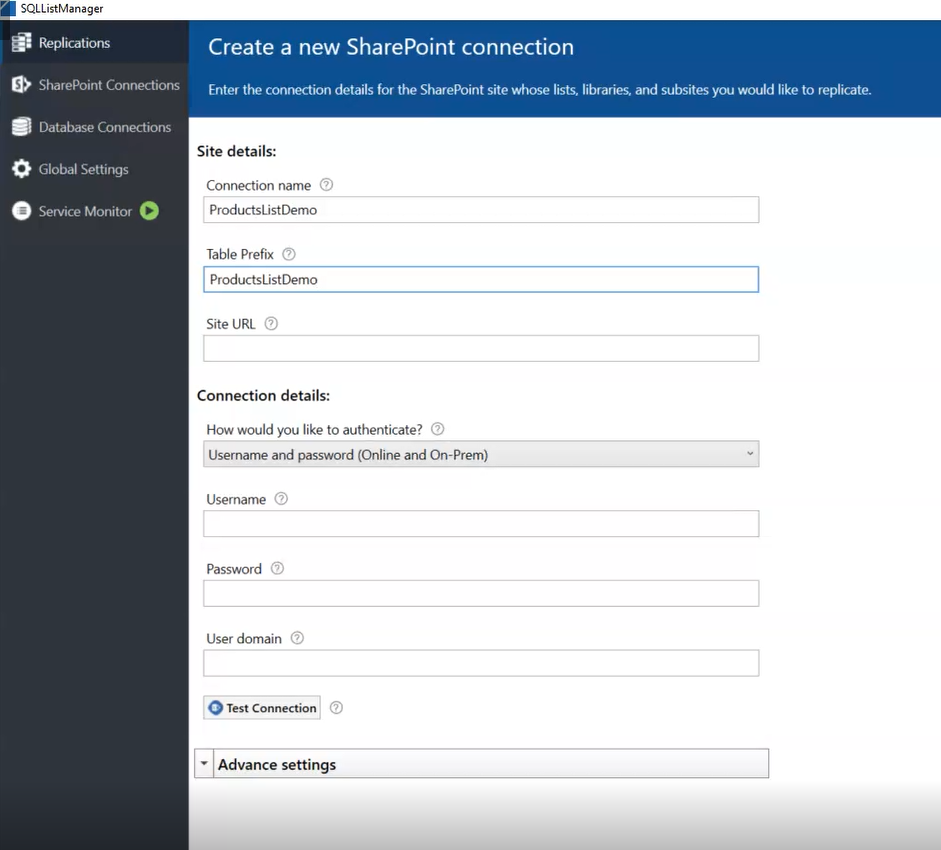
Create a new SharePoint connection, enter the connection name and Table prefix “AxioDemoLists”
and select the SharePoint site which contains the lists and clicks next.
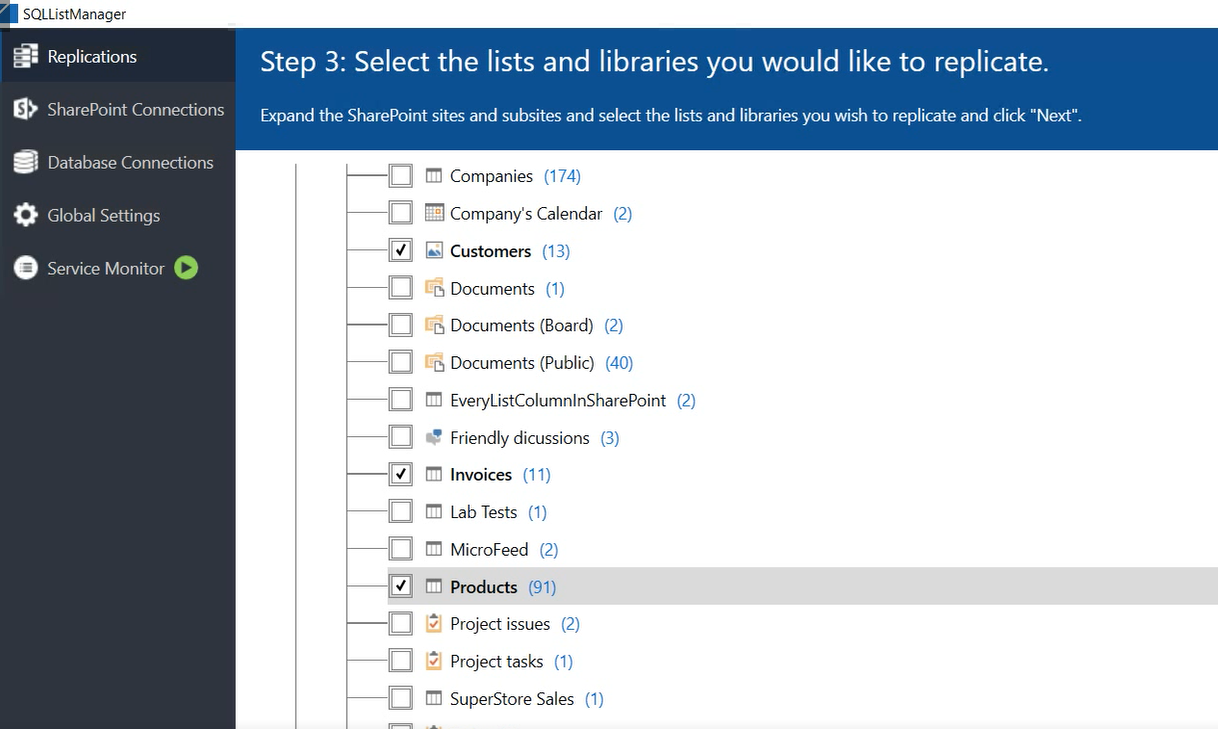
The next step is to select the replication lists, we will select the 3 lists which are going to be used for this exercise i.e. Product, Invoice and Customer.
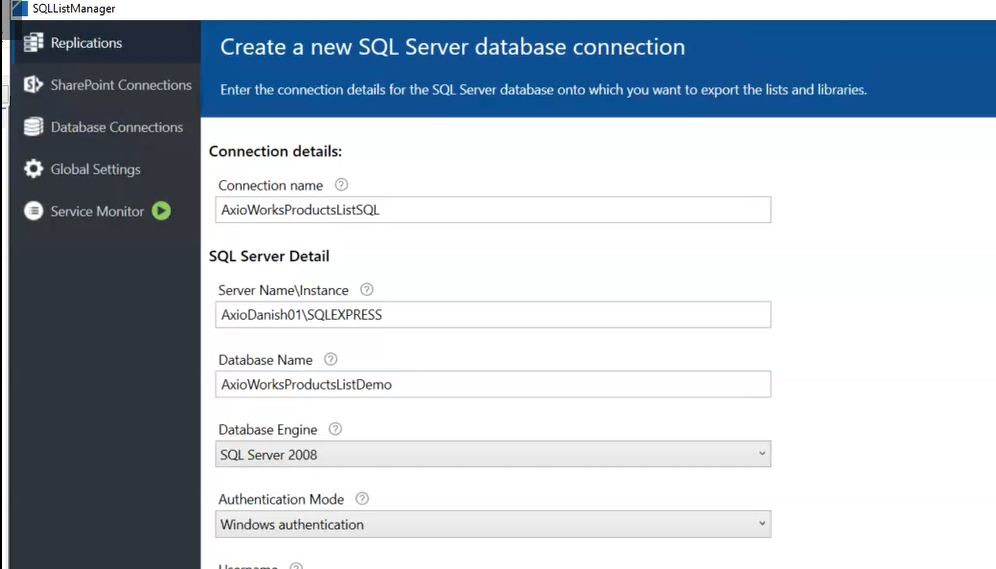
Next, enter the details for the destination SQL database connection which is the database we created earlier.
Last step is to give this replication a name, and keep the default options as checked and then click finish.
Once the replication is created, SQList replication service will start off for synchronizing the SharePoint lists and SQL database.
Once the service is started, you will see that some tables have been created in the destination database including the tables for the lists which we selected.
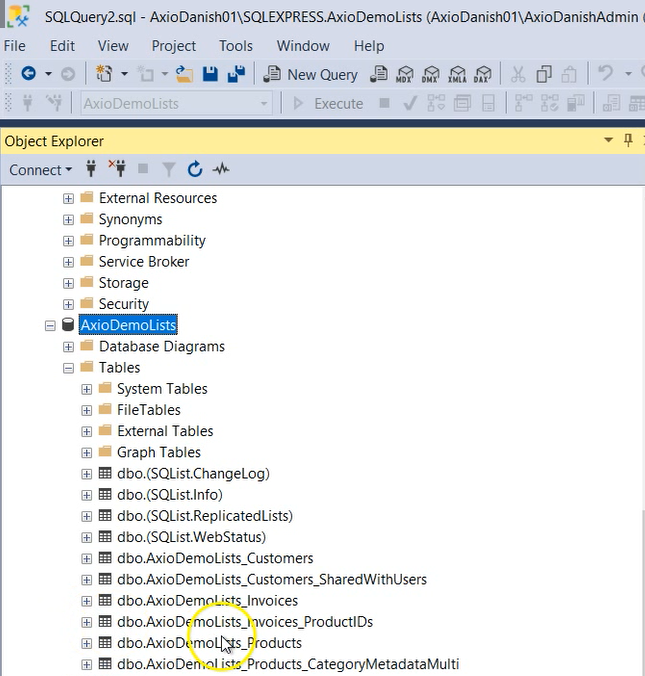
Note: SQList will keep the database in-sync with the SharePoint lists which means any updates made in the lists will be replicated in this database as well.
Step-3: Comparison of SharePoint List Columns and SQL Columns
Now, let’s look at how the Sharepoint lists and columns are transformed into SQL tables and SQL columns.
First off, there is a table created for each list.
In addition to that, a table has been created for each lookup column as well which will store the ID of the parent list (Invoice) item and the value of lookup (Customer) column. For multiple-values selected, there will be multiple rows for each (Product) item selected.
To understand how the SQList creates SQL data tables for the SharePoint lists, Lets to do the comparison of Invoice and product List columns in SharePoint List and SQL table.

Below is the table to show the conversion of sharepoint list columns into sql data columns.

For each lookup column with “Allow multiple values” selected, SQList creates a separate SQL table which stores the ID of the parent list item and the lookup item ID/s creating a one to many relationships between parent and child tables. Since the Invoice list has a lookup column “Product IDs” with allow multiple values checked, a table “AxioDemoLists_Invoices_ProductIDs” is created.
Now, let’s compare the date in SharePoint List and SQL table to see how data is replicated by SQList in the SQL table. We will also join the Products, ProductIDs and Customer tables to get the lookup values.
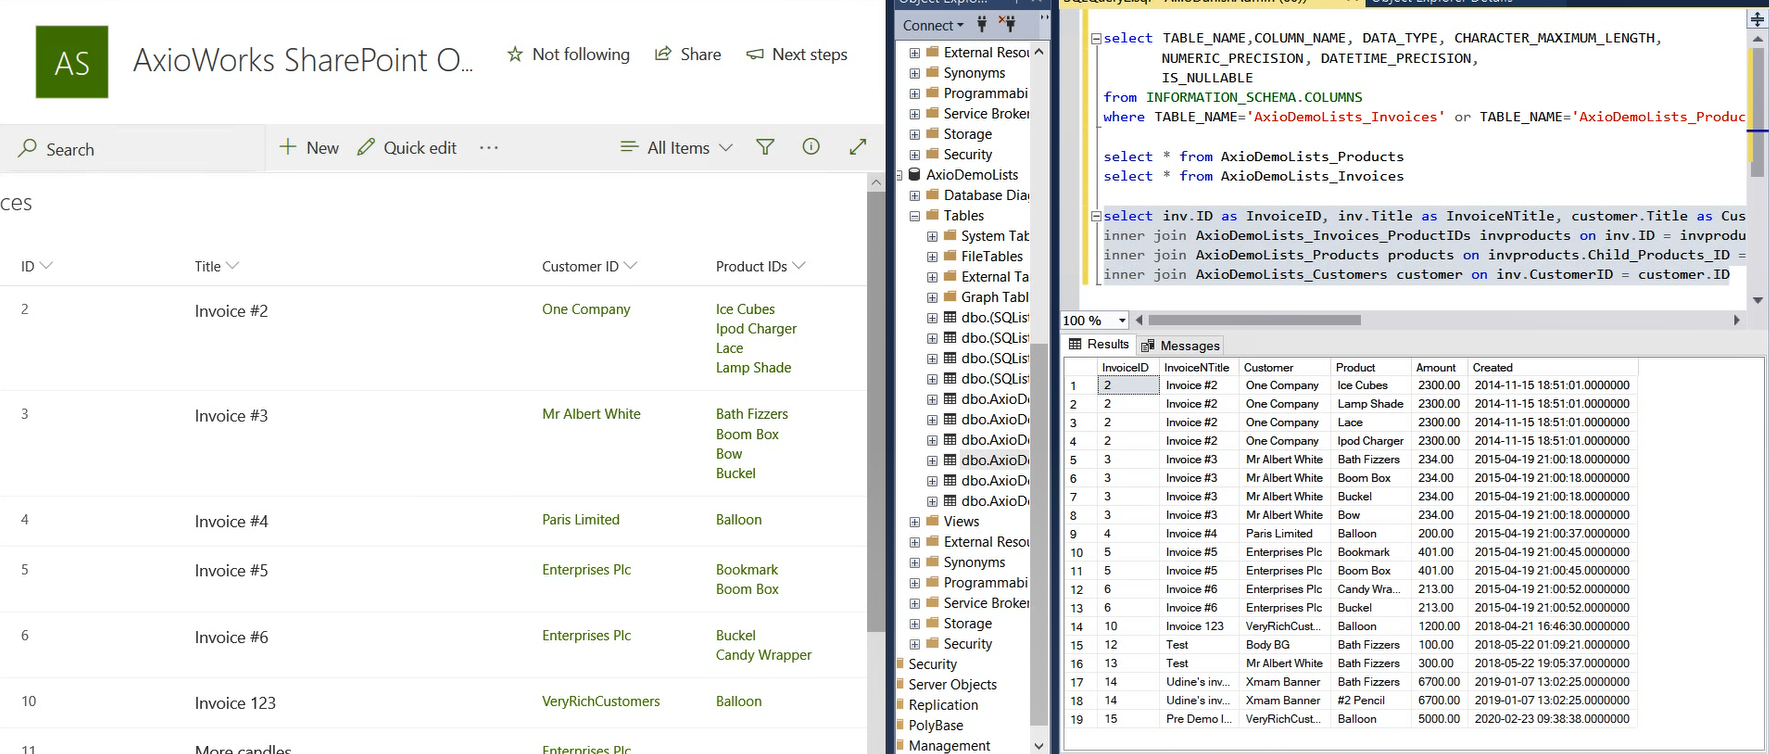
The result shows that for each invoice item, there are multiple no of rows returned based on the no of products associated to that invoice. but apart from that, the data is stored in an identical fashion.
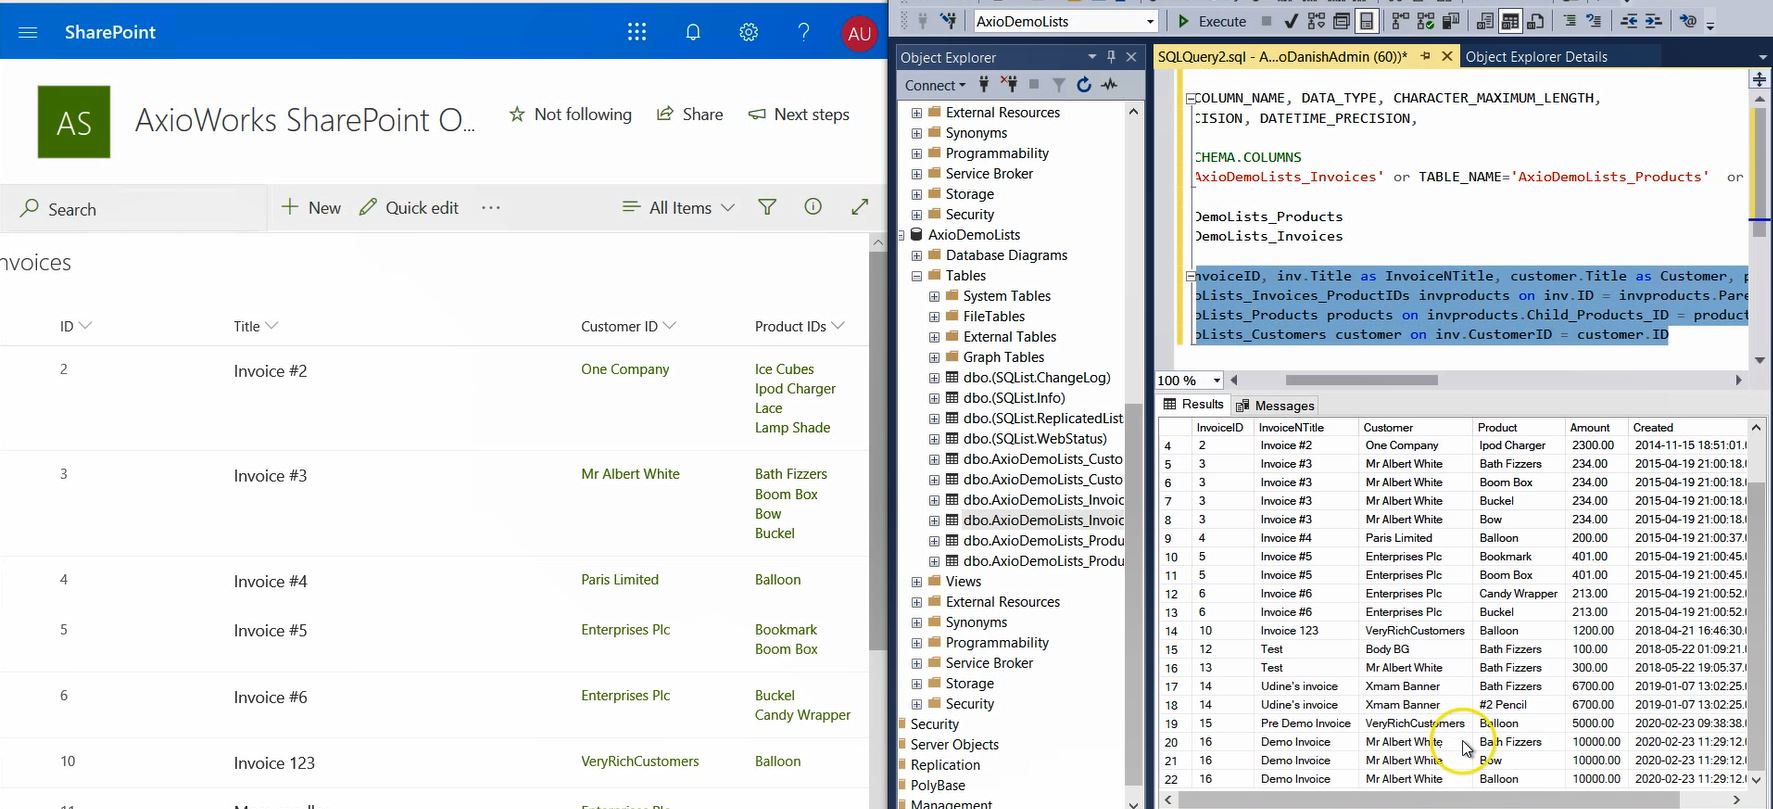
Now to test the synchronization, let’s go to SharePoint and add a new invoice “Demo Invoice” with three products. when we run the query again, we will three new rows are returned for the new invoice item.
Conclusion
To summarize, today we saw:
- how SQList transforms SharePoint List into a set of normalised SQL tables;
- what types of data columns are created against each SharePoint list column;
- how replicated data are stored in SQL tables using SQL column types that most closely match the types of thecorresponsing CharePoint columns;
- how multi-lookup columns are stores in auto-generated relational tables that allows the many-2-many relationships between the main and lookup tables.